

Receiving – Manual – Single Period, Multiple Properties
-
View > Receiving > Locate the respective property which houses the invoice to be split
-
Click the hyperlinked PO # associated with the invoice to split to open the Receiving Entry screen
-
GL code line items as needed
-
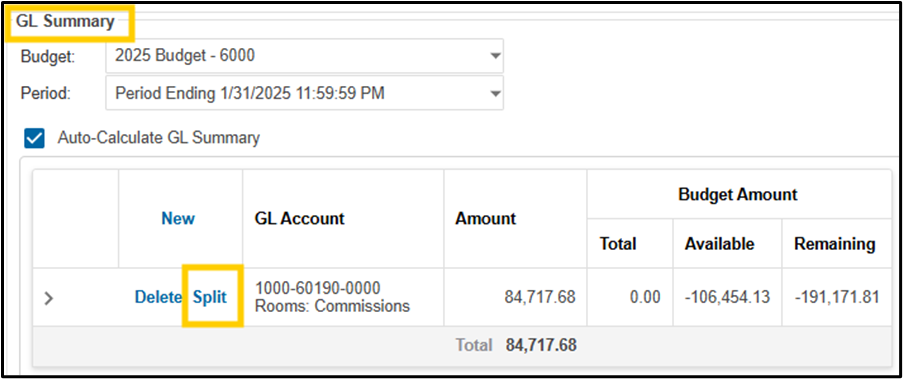
Scroll to the GL Summary portion of the Receiving Entry screen
-
If all applicable settings are in place, a hyperlink will appear next to each GL in the GL Summary called Split
-
Click Split next to the GL needing to be split amongst multiple properties
-
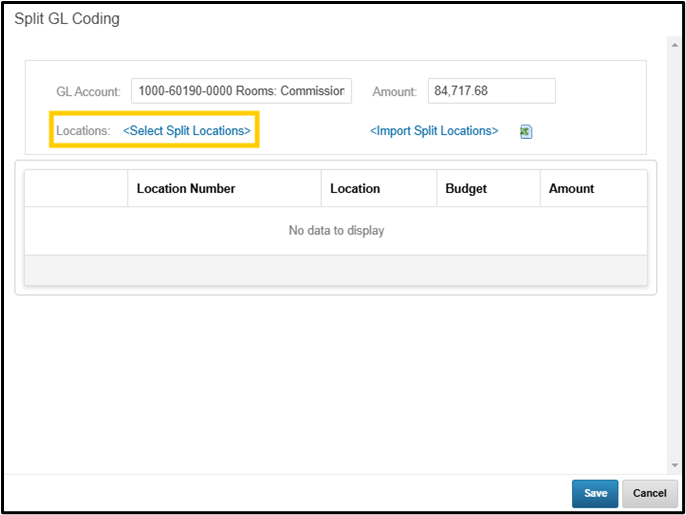
Click Select Split Locations to select the properties you wish to split the invoice amongst
-
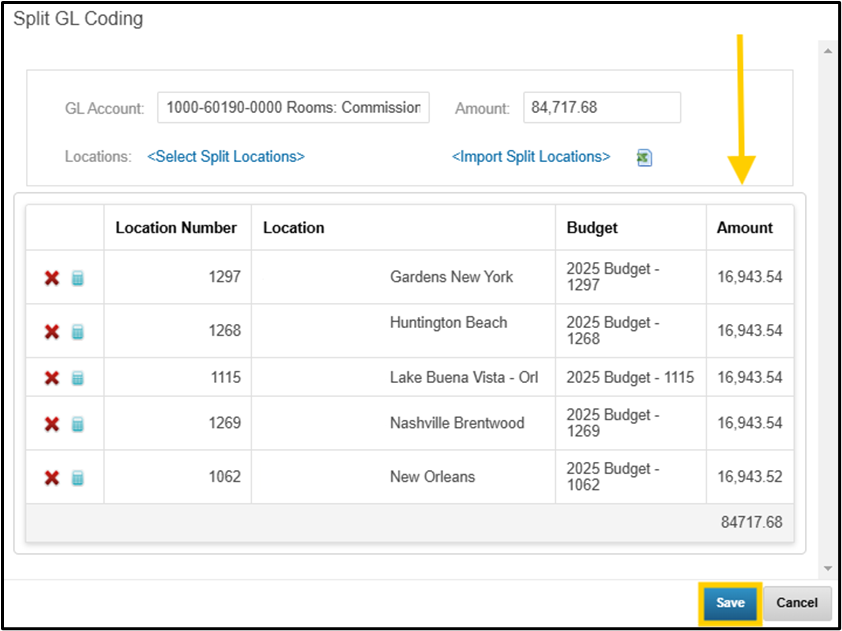
Select the properties which need to be allocated against the current invoice by clicking the checkbox next to each property > Save
-
The system will automatically evenly split the invoice amongst the properties selected.
-
To adjust allocations per property, adjust the Amount field
-
-
Click Save
-
Click Submit to finalize the receiving entry
Receiving – Import – Single Period, Multiple Properties
-
View > Receiving > Locate the respective property which houses the invoice to be split
-
Click the hyperlinked PO # associated with the invoice to split to open the Receiving Entry screen
-
GL code line items as needed
-
Scroll to the GL Summary portion of the Receiving Entry screen
-
If all applicable settings are in place, a hyperlink will appear next to each GL in the GL Summary called Split
-
Click Split next to the GL needing to be split amongst multiple properties

-
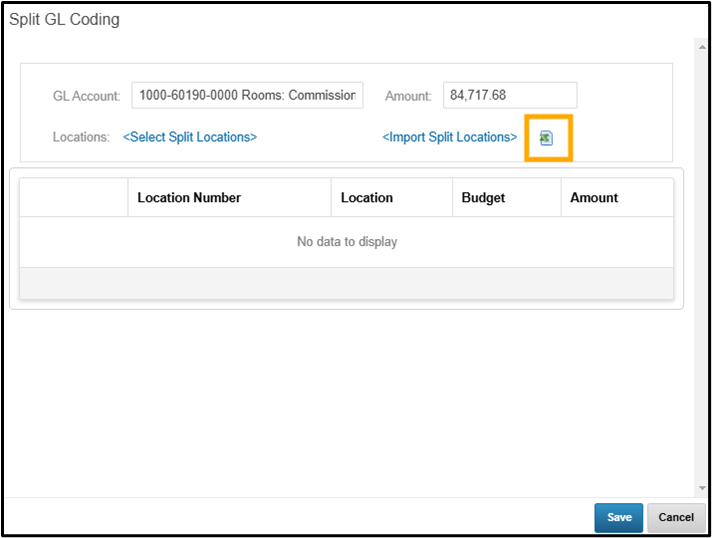
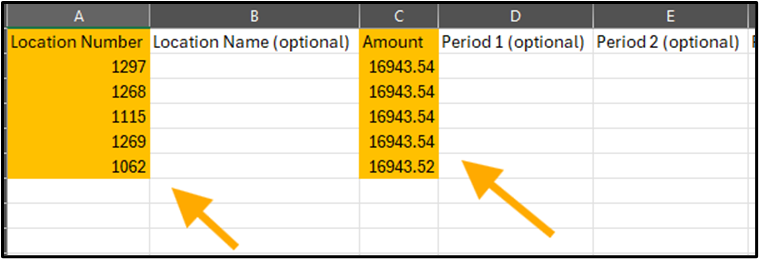
Click the Excel icon next to Import Split Locations to download the import template
-
Fill out the template
-
To split an invoice in the current period, only fill out the Location Number and Amount columns.
-
-
Save the template
-
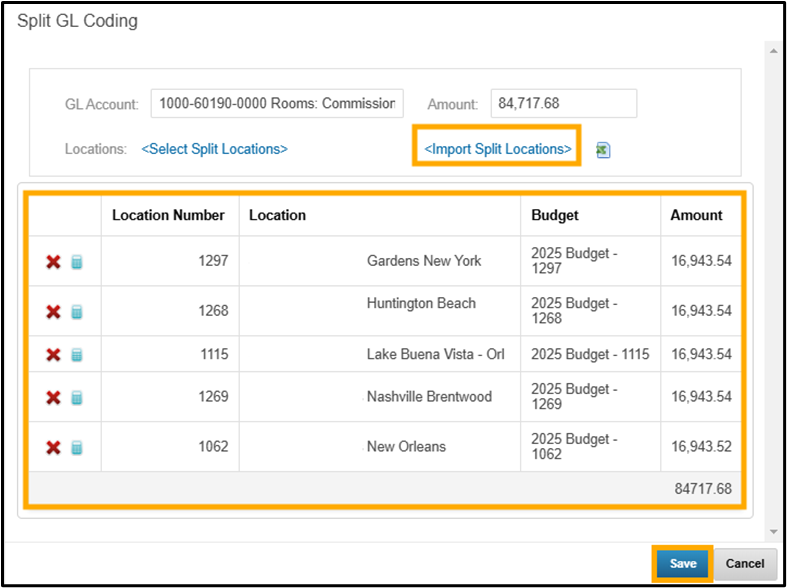
Click Import Split Locations
-
Browse for and select the Split Coding template previously filled out and saved
-
The data from the template will populate on the screen for review
-
Click Save
-
Click Submit to finalize the receiving entry